Symbols, Instances, and Library
Creating Button Symbols
A button has following four states.
Up: This is the normal state of the button.
Over: This is the state when the mouse over the defined button.
Down: This is the state when the mouse is clicked.
Hit: This state indicated how much area is defined over the object to act as a button.
Up: This is the normal state of the button.
Over: This is the state when the mouse over the defined button.
Down: This is the state when the mouse is clicked.
Hit: This state indicated how much area is defined over the object to act as a button.
To create a button, follow the following steps:
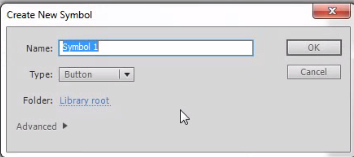
1. Select the New Symbol option from the Insert menu. The Create New Symbol dialog box is displayed.
2. Enter a name, say Button 1, for the symbol in the Name text box.
 3. Select a behaviour type for the symbol as "Button".
4. Click OK to close the dialog box. The dialog box will get closed and we will be move to the Symbol Editing mode.
5. On the Button Editing Stage, Create the shape we want to use as a button. (Eg: draw a rectangle filled with a gradient).
6. Insert the New layer and rename layer2 as Text.
7. In the Text Layer place the text box in the middle of the rectangle. Type the text READ in the Text box. The button Stage and Timeline should appear as shown in Figure.
1. Select the New Symbol option from the Insert menu. The Create New Symbol dialog box is displayed.
2. Enter a name, say Button 1, for the symbol in the Name text box.
4. Click OK to close the dialog box. The dialog box will get closed and we will be move to the Symbol Editing mode.
5. On the Button Editing Stage, Create the shape we want to use as a button. (Eg: draw a rectangle filled with a gradient).
6. Insert the New layer and rename layer2 as Text.
7. In the Text Layer place the text box in the middle of the rectangle. Type the text READ in the Text box. The button Stage and Timeline should appear as shown in Figure.